Tuesday, April 30, 2013

As good as Starbucks or even better


There are only three tea rooms that are registered as a national treasure in Japan;  Taian, Mittan and Jyoan.  There is a replica of the Jyoan in Nagakute which is situated next to my city.  The tea room is called Koshoan.

 
You walk though the tea garden and purify you hands and mouth at tsukubai, the water basin.  Then, you enter the tea room from the short crawl-in doorway.  It is a small tea room uniquely designed with 3.5 tatami-mats.  You will find flower and hanging Zen words scroll displayed in the tokonoma alcove.  You sit in the tranquility.  The sweets are served while you watch the host preparing the tea for you. 
 

It will be an ephemeral 15 minutes.  You can experience this in Koshoan on every second Sunday of the month.  I love enjoying coffee at Starbucks, but having tea in the replica of a national treasure is also good.  If you know, this costs you only 250 yen, you would think it’s even better than Starbucks!!  Can you believe the price?!  It is the most reasonable tea ceremony that I ever know.  Attending this event every month is my trivial enjoyment these days.  Do you have any pleasing spot in your neighborhood?

Monday, April 22, 2013

Preparing eight servings of tea with an ordinary teapot


If you only have a regular size teapot and if you have many guests, how do you serve tea? 

It’s good to have a large teapot if you occasionally need to serve tea for many people.  Otherwise, for common households, you can prepare the tea only a few servings.  I recommend you to choose the right sized teapot by considering your main use.  For special occasions, try the method that I introduce today.  You can serve the double number of serving with your teapot.

The method is adding and blending the first and the second brewing, which allows you to serve twice of the amount at once.  You can achieve the same quality for all the servings.
 

What you need (8 servings)
Tea leaf: sencha 8 grams (2g per serving, Prepare your tea for 4 servings which is enough for the teapot and you have to do it twice to prepare 8 tea cups all in all.)
Hot water: 560ml (8 servings)
Teapot: 280ml (make it twice to make 8 servings)
Pitcher: 560ml or larger
Tea cup: 8 pcs


1. Put 280ml boiled water each into the teapot and the pitcher
 
2. Transfer all of the water from the teapot into the first four cups for the first brewing. Have the water in 80C/176F
 
3. Put the tea leaves into the teapot and pour the hot water into the pot from the four cups
 
4. Leave the pot for one minute. While waiting, transfer the water from the pitcher into the other four cups for the second brewing.


5. When the time comes, pour the tea from the teapot into the pitcher


6. Transfer the hot water from the four cups and wait for about 30 seconds

7. Pour the tea from the teapot into the pitcher containing the first brew
 
8. Stir the tea lightly and then serve into the eight cups!!


The idea is that you mix the first and second brew and double the serving amount of your teapot.  You may do the procedures in some different orders.  It is fine as far as you can serve the same quality tea for every cup.  

Tuesday, April 16, 2013

How to tie the ribbon on a wooden box


When you buy a good Japanese tea ware, it usually comes in a wooden box.  It is nicely tied with a flat string.  Once you open the box, some of you might have trouble to properly retie the string when storing the piece.  Today, I’ll show you how to tie the ribbon. 
 

One advice!
Keep the string flat always not to twist it.


Place the ribbon like in the picture
Have the strings in the same length for both extending to the right and towards you
In my description, the string is put over the left corner of the box; there is a case wherein it starts with the right corner. If so, do the all the procedure in reversing right and left.


Try not to tie the knot too tight. It might damage the string
Have the ribbon symmetric


Thursday, April 11, 2013

How to obtain 80C/176F water


You do not use boiling water for preparing most of Japanese tea.  Around 80C/176F is a good temperature.  Because, too hot water extracts a lot of bitterness and you don’t get the best flavor of green tea.  It is said that you should obtain 80C/176F water by cooling down the water once it has kept boiling.  Why is that?

Cooling down the boiled water takes time and it’s a kind of like troublesome.  You might want to skip that.  Can you just add cold water?  Or can you remove the kettle from the stove before boiling?  Some of you might have such wonders.

I think of two reasons for the cooling down water issue.  The first reason is that you can take away chlorine odors from tap water by boiling it.  (Check out the related entry >>> “Canyou take off chlorine smell for tap water by boiling?”)  In Japan, many people use tap water for tea, so this is quite effective for them.  I understand that some people say “I’m fine because I use bottled water” or “I have a water purifier”.  The other reason will work for those people, too.  You cool down the water by pouring it into the teapot and cups, which also makes them warm up.  So, you will always have the teapot in a stable temperature.  It helps you prepare your tea with a steady flavor always.  The warmed up teapot and cups also help the tea not to get too lukewarm during the preparation.  The served tea is still hot and nice.  I believe that these aspects can be quite beneficial for your tea.
 

Making 80C/176F water is not that difficult.  It’s easy!  Let take a look.


1.Pour the boiled water into the cups
This helps measuring the right amount of water.
Do not leave it for a long time at this point; the cups might get too hot to hold.


2.Pour the water from the cups into the teapot
Then wait for several seconds. Adjust this time by the conditions and for the result you want.


3.Pour the water back from the pot to the cups
That’s it!


The water in the cups is now about 80C/176F.
The empty pot is ready for you to put tea leaves on!

 
The result will differ by conditions such as the room temperature, servings, and the size and material of pot and cups.  If you want to have higher temperature, you can skip the first step and directly pour the boiled water into the pot.  If you want much lower temperature water, you can add another step using another vessel, yuzamashi or water cooler.  I believe that how to make 80C/176F water is crucial to prepare non-chlorine and steady flavor of tea, and helps to serve the exquisite tea in the best temperature!   It is not that difficult as you think.  Give it a try!


Check out my past entries for more information
- Can you take off chlorine smell for tapwater by boiling?
- Well boiled water makes delicious green tea


Friday, April 5, 2013

Alternative matcha recipe 2


I have tried series of tests on preparing matcha since the taste of the tea prepared using the alternative way was not as good as the tea prepared in the traditional method.  The main reason is the temperature.  The alternative tea was lukewarm.  I simply found the hotter tea a lot tastier than the other one.  

According to the tea-workshop instructor. one of the advantages of the alternative recipe was supposed to be lump-free.  However, I didn’t find any lumps in the tea prepared with the traditional recipe, either.  You are not able to see the advantage much with the fluffy brand new tea.  So, as for me, the absence of lump formation is not considerable advantage.

This time I was more careful about pre-heating the tea bowls, and made sure not to drop the temperature of the tea.  I stored the matcha for two weeks and made the tea less fluffy.  After words, I tried the same test again.

What do you think the result is? … It turned out awful!  The tea got much bitterer than the first time.  Moreover it was watery and less flavorful.  I didn’t like it at all.  One of the reasons of the failure is probably the pre-heating of the tea bowl.  Even though I used cold water for the first step, the small amount of water was heated up by the hot bowl.  The warmed water helped in extracting the bitter taste from the tea.   What made it worse is that I took a lot of time preparing this tea.  I was supposed to mix it for 40sec at the first step and 10sec at the second, but I actually took 70sec and 15sec respectively because I got busy taking some pictures for this blog.  So that gave the tea an additional time to infuse more bitterness.  


So, I had another try.  This time, I didn’t warm up the bowl at all.  Instead, I used a boiling water for the second step.  As in the previous tests, there wasn’t much difference in appearance.  The temperature for both tea were about the same, so I could simply compare the flavor this time.  The tea with ordinary method was as good as always; it has a round and rich flavor even though I noticed some lumps upon drinking.  On the other hand, the tea using the alternative method produced light foam and mild flavor.  It didn’t have bitterness at all.  Now I can say that this test is finally successful!  I didn’t find any lumpy stuff either while the traditional tea was a little rough.  It was smooth and easy to drink.  Therefore, I conclude that it is great for matcha beginners.  

The tastes of the ordinary and alternative tea were slightly different, but both were good.  It depends on your preference.  If I have to choose, I would prefer the ordinary way of preparing.  

Even though I didn’t find any dramatic advantage when it comes to flavor with the alternative tea, I found a big advantage in preparation.  That is pre-sift the matcha is not needed.  I have been always thinking that sifting matcha is quite troublesome.  Moreover, you don’t have to pre-heat the tea bowl nor have to cool down the boiling water.  
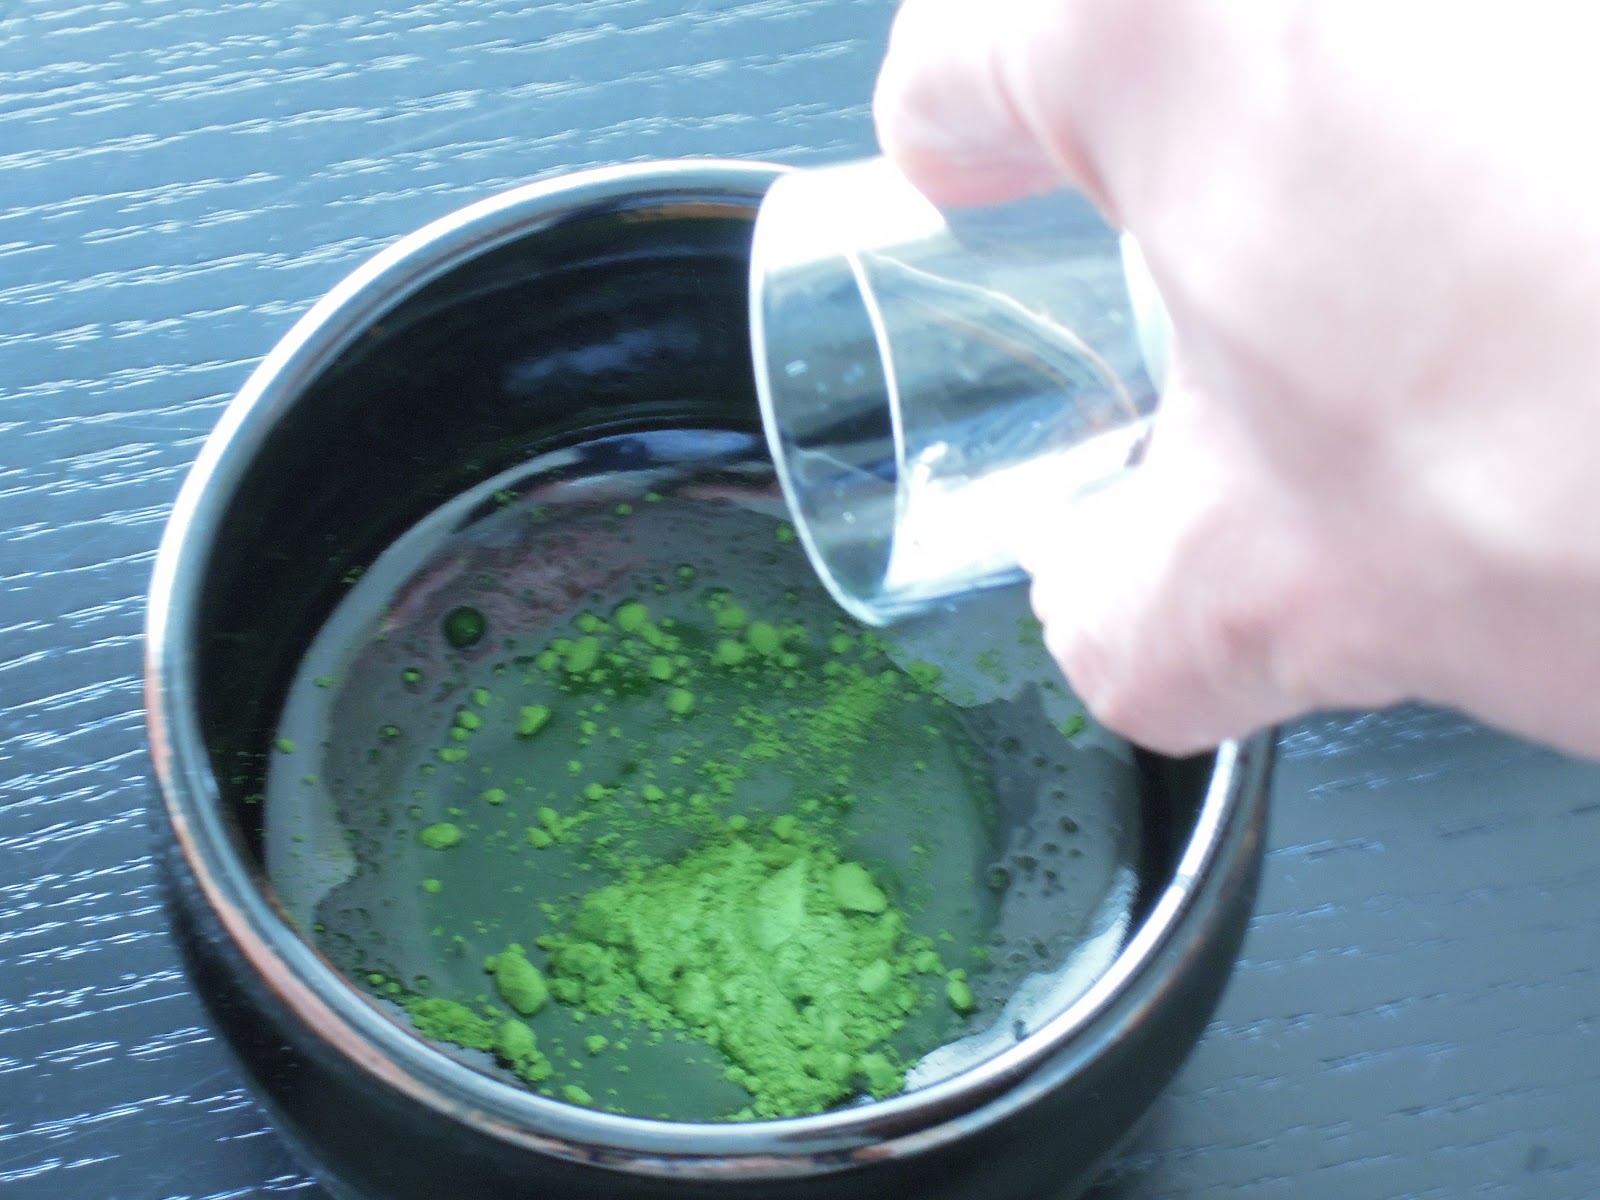
You just put matcha powder and a little bit of cold water and mix well.  Then add boiling water and whisk it quickly.  How easy is that!  I’ll definitely use this method when I’m preparing matcha for myself.  For your casual daily matcha, this alternative recipe will work.

Let me review the recipe.
No sifting matcha, No pre-heating of tea bowl, No cool down of hot water.
First step
- Matcha (1.8g) and cold water (10ml) in a tea bowl.
- Mix them gently until it gets smooth without any lumps.
Second step
- Add 50ml boiling water and whisk it using fast strokes to create foam on the surface.
- Don’t take a lot of time on this step.  10sec will do.

I hope you try comparing both the traditional and this new recipe and see it for yourself.


Alternative matcha recipe 1

 
An instructor at a tea workshop has taught me an alternative of preparing matcha. She said the good thing about this preparation is anybody can prepare this great bowl of matcha without fuzz! A failure-proof matcha she said. Of course, it's quite different from the way I've been learning it from my tea school. The instructor even told us that it has two advantages: first, even though you don't pre-sift your matcha, this recipe will give you less lumps in your tea. It would be smoother too. Second advantage is that it has more taste of the rich umami without the unpleasant bitterness. Yet, it also has its minor disadvantage. And that is the tea would be less aromatic.

I have already seen this method in some websites such as Youtube, but I haven't really given it too much attention till now. The instructor even insisted on trying to compare the new recipe from the traditional one at home. So I did and here how it went for me.

In the ordinary or the traditional way, we prepare the tea by mixing matcha (1.8g) and hot water (60ml/2oz) in a tea bowl with a tea whisk. Now, this new recipe involves two simple steps: First, mix the matcha (1.8g) well with 10ml/0.4oz of cold water. This process prevents lump formation. Second, add 50ml/1.7oz of hot water then whisking it more. This new recipe is for usucha (thin tea) but is almost similar to making koicha (thick tea). And voila!! This is how easy to make a smooth and sweet matcha!


Ordinary

New

Matcha

1.8grams

Water

Hot: 60ml/2oz

Cold: 10ml/0.4oz  Hot: 50ml/1.7oz

Whisking

20sec

40sec + 10sec
The alternative matcha recipe

Add a very small amount of cold water

Refrain from mixing the matcha vigorously and try not to make it foamy.
Mixing it gently would avoid any lumps.
A good 40 seconds of mixing will do fantastic.

The surface gets lustrous and looks very smooth like koicha.


Now, you can add hot water and whisk it for about 10 seconds with faster speed to achieve a foamy texture.

Left: Ordinary recipe, Right: New recipe
There seem to be not much difference in appearance as you can notice. But they definitely differ when it comes to aroma. The traditional tea has a richer aroma as the instructor has warned us. When it comes to taste and flavor, I got a totally different impression for the two. This is where it really gets interesting! I was shocked since it's not what I expected. I still found the ordinary tea tastier than the new one. Can you believe that?! The alternative tea was lukewarm. Even though I pre-heated both of the tea bowls, the first step with the cold water made the tea less hot than the traditional tea. I simply found the hotter tea tastier. I tried to find the rich umami sensation from the new recipe, but the umami didn’t matter anymore. The temperature has bigger impact for me to find the tea tasty. It was a bit disappointing for me, since I gave high expectations to the new recipe.

After drinking, I didn’t find any lumps in both tea bowls, though. Is it because I am a really good whisker?? Perhaps, not. It's because I used a brand new tea that I've just purchased. Even without sifting it, it still looks fluffy. That’s why there were no lumps even with the traditional recipe. So, with the brand new tea, I really couldn't see the said advantages of the new recipe. 

I guess I'd have to exert more effort into finding the advantages the instructor told me about this new recipe so I could give justice to what she has confidently told us. I did try to make this new recipe a number of times, but, of course, with my own personal touches!   So, better wait for my next blog entry and will share my story about this.